Brains Over Bronze: How to Change a Motorcycle Tyre (Or Tube) Without Breaking Your Back
Author: Team Adventure Moto Date Posted:28 October 2019
It’s riding season, and that means it may be time for new tyres! Swapping out motorcycle tyres for the first time isn't the breeze some YouTube moto-jocks make it out to be, but it’s a skill all riders should practice. Your back might still hurt a little afterwards, but with a few good pro tips, good tools, and practice, the task of changing a motorcycle tyre can become quick, easy, and rewarding. And knowing how to change your own tyre is a great idea for a few reasons: It’ll save you money and time once you have it down, you never know when a flat might happen, and more importantly, where. As an adventure rider, it’s knowledge that’s sure to come in handy, even if you don’t perfect the art of changing your own motorcycle tyres. Just knowing the theory and steps is a great place to start.
.jpg)
Let’s break it down, step by step.
1. Get your space ready.
Before you begin, get ready by making sure you have the right tools at hand. You’ll want a clean workspace on either a rubber mat, a clean pad, or even a piece of cardboard or carpet remnant. Avoid getting any dirt or debris into the rim and components, and make sure you leave a clean spot to keep tools and parts organised (we’ll get back to that). The right tools are key to a painless motorcycle tyre change.
Save yourself time and pain and don’t start the job until you have what you need:
- Bead Goop is worth it, but in a pinch use a little dish soap and water, or even Windex.
- Clean mat to work on.
- Air compressor or pump with a gauge.
- New tyre and tube (or new valve stem and valve core remover for tubeless tyres).
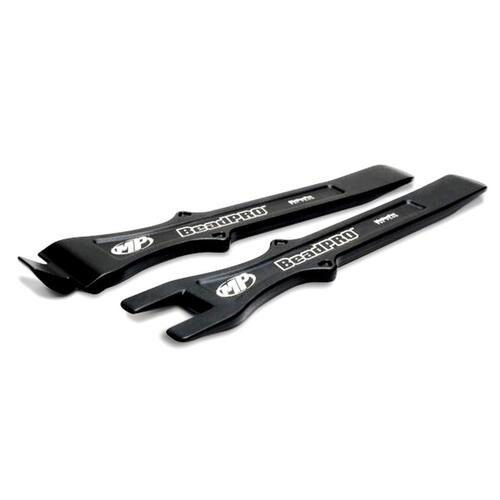
- Tyre levers. We’re big fans of the Motion Pro bead breaker and lever tool set. Though pricier than just levers, they definitely get the job done faster and easier.
- Bike stand, centre stand, or DIY prop.
- If you’re committed to tyre changing, upgrade to this great kit from BestRest for tubeless tyres, or BestRest for tube-type tyres.
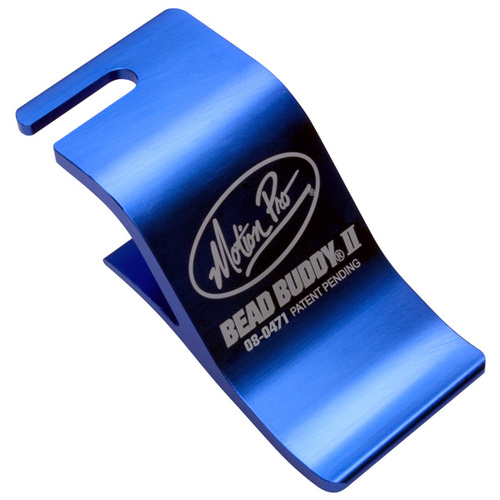
- This cheap little bead tool is a great choice, too.
2. Get those puppies hot.
Make tyre changing significantly easier by working with tyres that are warm. Old or cold tyres can be hard to work with, while warm tyres are much more pliable and forgiving. If it’s not a flat you’re dealing with, go do a few mainies before you start. Otherwise, put the tyres out in the sun for a while, or use a hair dryer or heater to warm the rubber up.
3. Prepare your bike.
If you don’t already have a center stand, it’s worth its weight in gold and we highly recommend you get one right this second. A universal bike stand is great, or the emergency mini lift if you’re on the road. We’ve seen people use all sorts of stuff, from blocks of wood to laying the bike down against a stump, or straight onto the ground for a wee nap. Either way, it’s a good idea to loosen the axle nut before the wheel is off the ground, and to make sure your tyres and rims are free from dirt.
Pro Tip: Before you slide off the axle, place a block under the raised tyre for easier removal. Then, keep close track of all the hardware that follows.
Setting it all down in order is a good technique for making sure spacers and all random bits and bobs go back on in the right order, or you’ll be left puzzling over what goes where. This is when you’ll be thankful for having a clean space to keep things organised. Don’t forget to get your brake calipers up and out of the way, and not let them dangle willy-nilly.
4. Goop up those edges.
Once the wheel is off your bike (and the tyre is warm), place it on your mat and lather on some lubricant or soap along the edge of the tyre, near the rim. Some kind of lubricant makes a big difference, and requires a lot less huffing and puffing. Start with the brake rotor-side up, and deflate the tyre completely. On tubeless tyres, use a valve core tool to remove the valve core stem.
Pro Tip: Swearing is actually good for you. F*rk yeah!
Did you know research has proven that swearing can actually help you endure pain? Apparently, swearing can actually be good for you! So if you find yourself suffering over a tyre change, why the fork not give it a try?
5. Break the bead, not your back.
Break the bead with either your body weight (this can be challenging, especially with old or cold tyres), or a specialised tool. We recommend using a bead breaker tool to make the job less enraging. Otherwise, use a knee or heel to help break the bead on both sides. This is much easier on smaller tyres. For stubborn beads, you can use a tyre lever (and knee) to slowly pry tyre and rim apart, bit by bit, until it gives way. This is the hard way, but sometimes necessary. Occasionally, remounting the wheel and slowly maneuvering the bike will do the job, but better to use this as a true last last last resort, and even less than ideal with a harder-to-control front flat!
6. Two levers = good. Three levers = better.
Once the bead is broken, work your first lever in (opposite the valve stem) and push downwards, trying to get the tyre’s edge up and over the lip of the rim. While holding down the first lever, work another lever or two in to the left and right, pushing downwards to continue prying the lip of the tyre over the rim, bit by bit. It’s not a precise science and there’s no single method, and everyone finds their own technique (and so will you). Some use a knee and hand to hold down two levers at a time, while working the outer levers around towards the right and left, closer to the valve stem. Others use a knee compressing the tyre down on one side towards the drop center (more on that later), working the levers on the opposite side. Although the 3rd lever isn’t totally necessary, it makes the task much easier and more efficient, as it helps keep that first lip of tyre from working itself back onto the rim.
Pro Tip: If you sound like a tassie devil, remember to reapply lubricant or soap to help levers slide along, or get that knee into action by compressing the opposite side of the tyre down.
Side Note: Tyre stands.
Some prefer to use a store-purchased tyre changing stands to help save their backs, while others make them out of old materials lying around. Whether you’re young or old, used tyres, barrels, or just a sturdy table can be helpful. You’ll find what works for you, but take it in small chunks. Trying to get large sections of tyre off the rim is more effort than it’s worth. Take small bites at a time, and if you’re feeling a twinge, walk to the fridge for a much-earned coldie and a stretch.
7. Repeat, and use that knee.
Once the tyre has been removed from the rim on one side, flip the wheel over and repeat the process. Having one knee planted firmly on the opposite side from where you’re starting gives you the wiggle room you need to make the job easier. That’s because the center of the rim actually has a smaller circumference than the outer part of the rim, where the bead gets seated. That middle section is often called the “drop center,” as it dips down towards the hub.
8. Inspect the rim.
After you’ve pulled the tyre off the rim (more finesse, less force), inspect the rim. For tubeless tyres, play it safe and replace the valve stem. Wipe off any debris from the rim, and check for any sharp or damaged areas.
9. Mount the new tyre, and DON’T put it on backwards.
Finishing the job only to find you put the tyre on backwards is a serious downer. Avoid this sinking feeling by triple-checking the direction of the new tyre (look for the arrows) relative to the rotation of the wheel itself. Visualisation is your friend.
Many motorcycle tyres will have a dot on them, which should be lined up opposite the heaviest part of the wheel, usually where the valve stem is located. Everything else is much like what you’ve already done, in the reverse order. Don’t forget the Bead Goop, this time to help re-seat the bead. Use your levers, and remember to work in small sections. Once one side of the tyre is back on, flip it over and put in your new semi-inflated tube (for tube type tyres) just like you would when fixing a flat (see above).
Having enough air in the tube gives it shape, and helps keep it out of the way. Go easy with the tyre levers anyway, so you don’t pinch your newly inserted tube. But if it happens, don’t feel too bad. It happens to the best of us the first few times! Patch it if you must, but it’s always better to replace it. And remember: go easy on the brake rotor when it’s face-down.
10. POP. Reseat the bead.
Air compressors are handy for this, as they usually have enough force to seat the beads and get that telltale pop. You’ll be glad you used Bead Goop, as it gets the job done easier. Once you’ve filled up your tyres with the correct PSI (located on the rim of your new tyre), look for any small air bubbles coming out, if you’re using tubeless tyres (thanks again, lubricant!). This will help show spots where the bead isn’t sitting properly.
Don’t forget to double-check your work, you tyre-changing pro!
It’s always a good idea to balance your wheels, and remember that new tyres are very slick, so go extra easy. And don’t forget to pressurise those brakes before riding off!
And don’t hesitate to give us a ring with any questions, or stop by our Sydney or Brisbane store. Can’t be bothered to change your own tyres? We’ll help you with that, too.
Need to change tyres this season? Check out our supply here or the huge selection at Tyres For Bikes.
Products In This Article